
Don't want to code along? Here is the GitHub repository for what we are building on this post!
Most apps sooner or later will have to deal with sending emails to the user, that being after registration or a specific event. After sending the email, a developer most likely would want to test how the user would receive it or if there is a link, how it reacts within the app. Using a real SMTP server for this can be tricky and could end up spamming a user with emails without needing to. That is why a fake SMTP server can be useful as it can allow you to send emails to a safe box that will trap all these emails and can be fetched if you need to use them to test your flow or content. There are many SaaS (Software as a Service) that can set up this server for you, however, they can be costly and limiting. That is why in this post, I'll be teaching you how to use Mailhog with Docker to create a fake email server and be able to fetch emails so you can use it on your tests.
Creating an Express Server
In this tutorial, I'll use an Express server with Nodemailer since it is my main toolset. Regardless, this method will work for any stack that can use SMTP as a client. First, start a node environment by running:
Then, install the required dependencies:
Next, create a server.js which will start our server:
Add a start script in package.json to start our server:
Finally, start the server with:

Setting up Docker
Setting up Mailhog is as easy as using your OS install command. However, if you are sharing your repository with other developers it would be nice to use Docker so that it can work as expected on other machines or in CI (Continuous Integration). Also, the developer is able to clean the history as needed by just removing the container.
If you don't have Docker installed, please refer to their site and follow their instructions on how to install it for your OS.
Note: If you are using Linux, please install Docker Compose on their docs page
Once you have installed Docker, create a Dockerfile. This will fetch a Node.js image and start our server.
Also, create a .dockerignore:
Create a docker-compose.yaml which will start up our just created Dockerfile and also Mailhog.
Finally, run:
And you will see that our images will be built and our servers will start automatically!

Receiving Emails
To receive emails we just have to send them as we would for a normal SMTP. Go to server.js and add the following :
Here we create a Nodemailer transport with Mailhog's default credentials. Also, a GET route that receives an email parameter to where we want to 'send' it. Now if you head in your browser and type http://localhost:3000/send_email/test@test.com you will see a 'sent!' JSON response. If you head towards Mailhog's dashboard on [localhost:8025](http://localhost:8025), the email we just sent will be visible and you can open it to see any details such as headers, and text content.

Query Mailhog
Querying Mailhog is as easy as doing it for a REST server. To find all the possible routes to query, you can find their Swagger JSON and YAML on their GitHub. To get all the emails from a specific email we use the following GET route http://localhost:8025/api/v2/search. Since we sent a message to test@test.com our query will be http://localhost:8025/api/v2/search?kind=to&query=test@test.com. If you paste this in your browser you'll see the email we just sent!
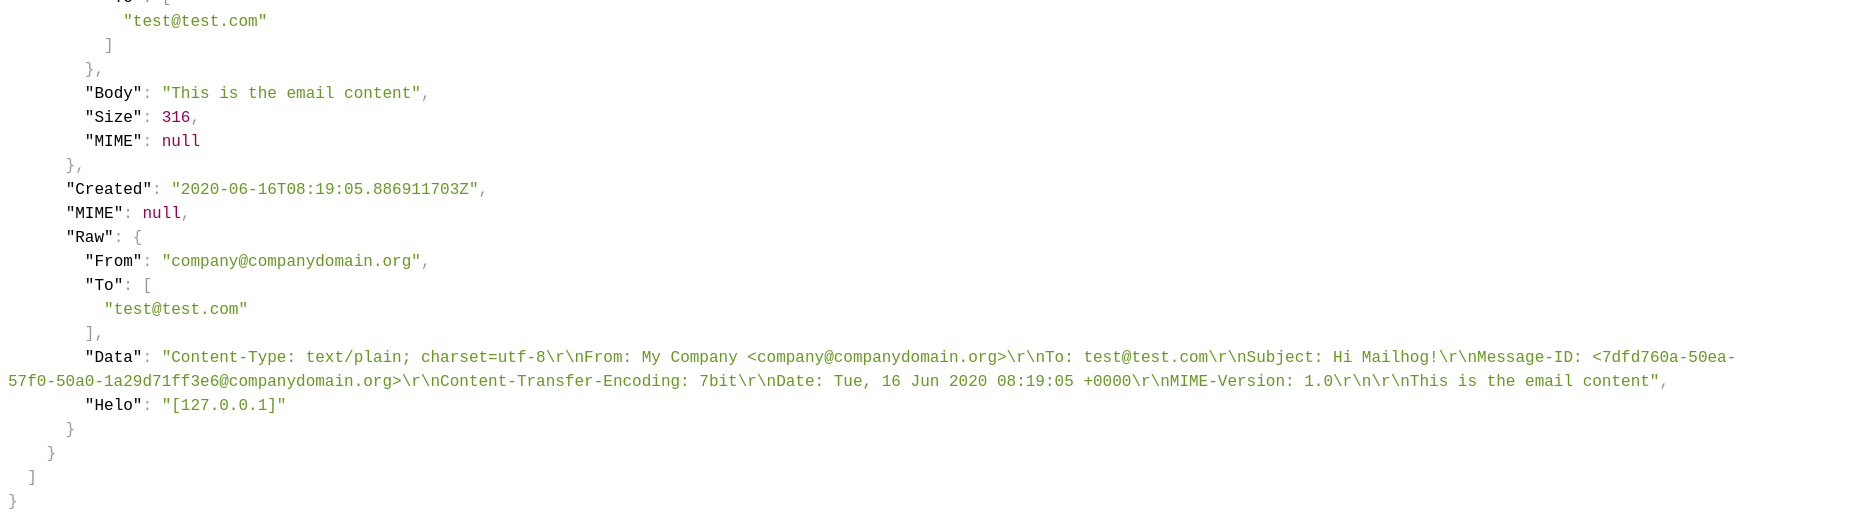
Awesome! Now you can use this information for testing using Cypress or Jest.
Conclusion
Testing email flows is very important to guarantee a stellar experience for users, especially since these flows can sometimes be fundamental for general functionality like a sign-up confirmation. Using our real SMTP server can result in sending a user an email by mistake. Also, setting up a fake SMTP server using a SaaS provider like Mailtrap can be expensive. Instead, we can use Mailhog and Docker to create this server quickly that allows us to query for sent emails so we can use them in our tests without dealing with quota or price plans.
I hope you found this article useful. For more up-to-date web development content, follow me on Twitter, and Dev.to! Thanks for reading! 😎


